Index
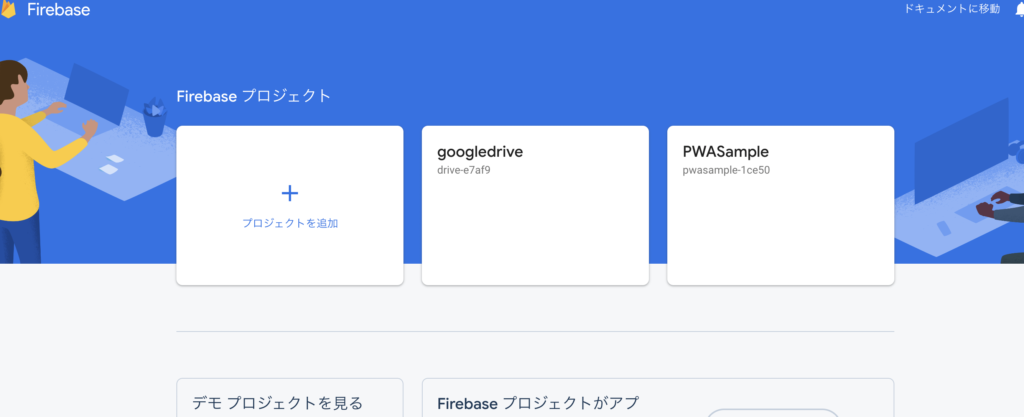
firebaseConsoleからプロジェクトを新規作成します。
プロジェクトを作成ボタンを押し必要事項を記入すると作成完了です。(今回は既にgoogledriveを作った後の画像)
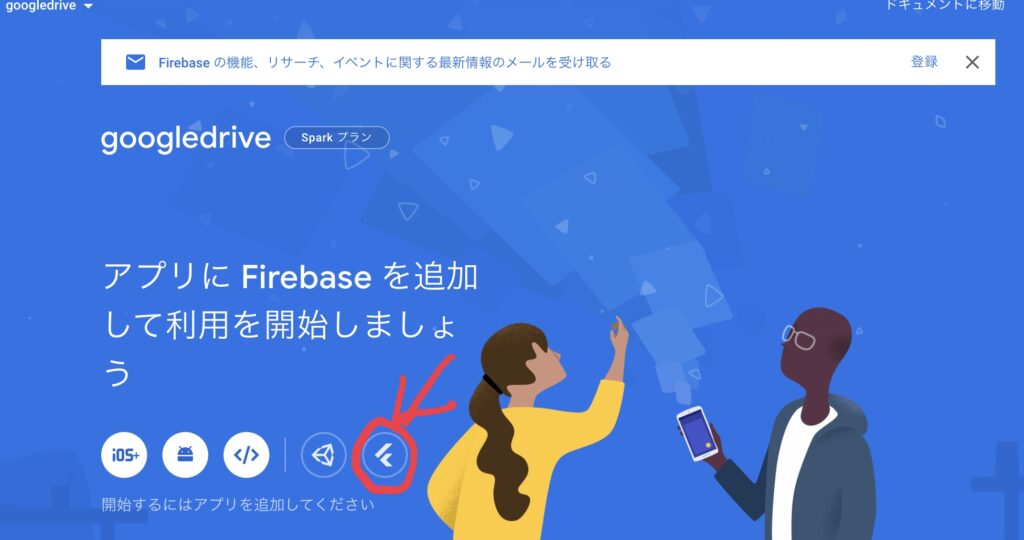
プロジェクトを作成し終わるを以下の画面が表示されますので、赤矢印のflutterを選択します。
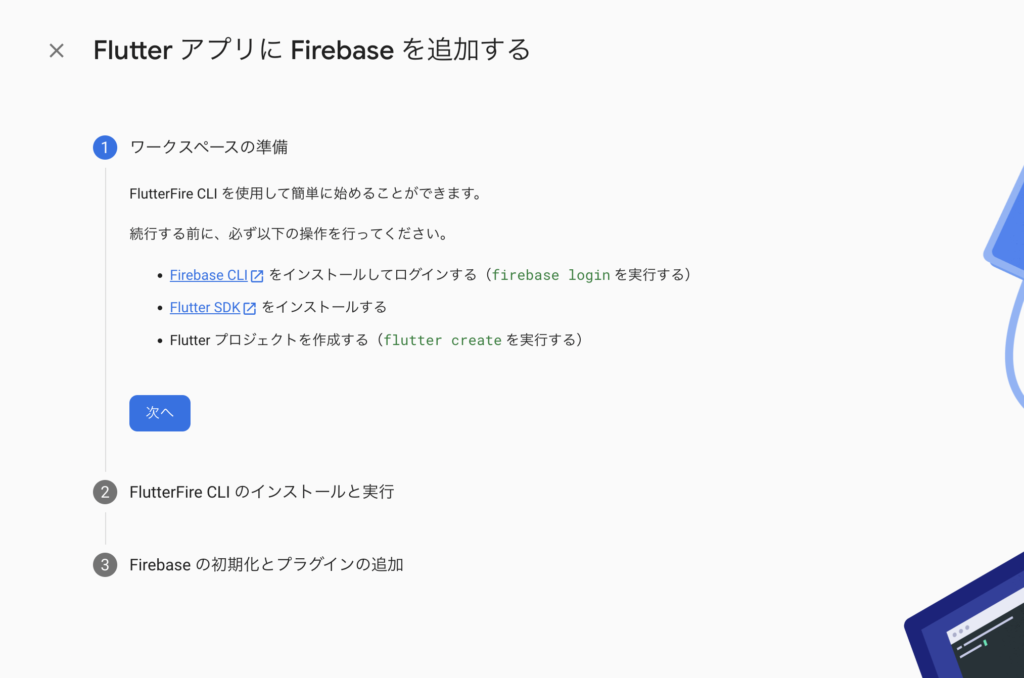
手順に沿って作業を進めていきましょう。
①firebase loginをターミナルで実行
以下のようにlogが流れ、勝手にchromeに遷移し、googleアカウントのログインを求められます。
|
1 2 3 4 5 6 7 8 9 10 11 |
i Firebase optionally collects CLI usage and error reporting information to help improve our products. Data is collected in accordance with Google's privacy policy (https://policies.google.com/privacy) and is not used to identify you. ? Allow Firebase to collect CLI usage and error reporting information? Yes i To change your data collection preference at any time, run `firebase logout` and log in again. Visit this URL on this device to log in: https://accounts.google.com/o/oauth2/auth?client_id=563584335869-fgrhgmd47bqnekij5i8b5pr03ho849e6.apps.googleusercontent.com&scope=email%20openid%20https%3A%2F%2Fwww.googleapis.com%2Fauth%2Fcloudplatformprojects.readonly%20https%3A%2F%2Fwww.googleapis.com%2Fauth%2Ffirebase%20https%3A%2F%2Fwww.googleapis.com%2Fauth%2Fcloud-platform&response_type=code&state=211428523&redirect_uri=http%3A%2F%2Flocalhost%3A9005 Waiting for authentication... ✔ Success! Logged in as xxxxxxxxxxx@gmail.com |
②flutter SDKをインストール
この記事を見ている人は既にできているはず。
③flutterプロジェクトを作成
自分はvscodeから作成しました。
ここまでできたら次へを押してください
以下の二つのコマンド実行
二つ目のコマンドはプロジェクト毎に違いそうだったのでxxxxで書きました。
|
1 2 |
dart pub global activate flutterfire_cli flutterfire configure --project=xxxxxxx |
いくつかコマンドでやり取りが必要ですが基本enterでOK。
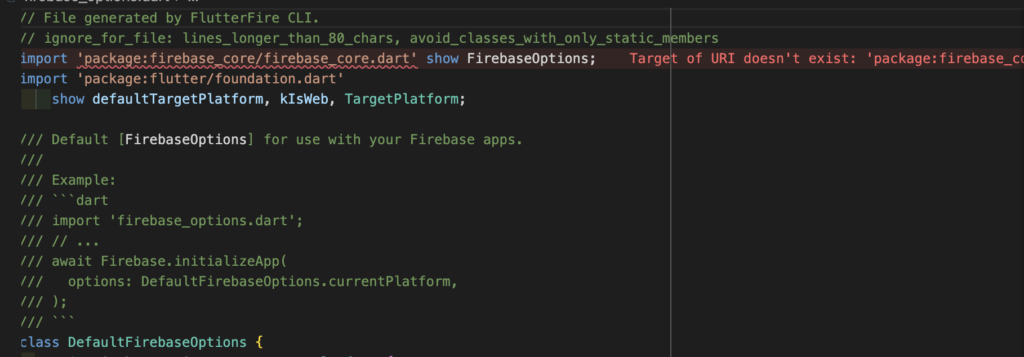
lib/firebase_options.dartが作成されていれば成功です!
こんな感じでエラーが出ていますが、クイックフィックスからパッケージをインストールすればOKです。
アプリが追加されました!

Firebase cosoleから以下の項目をクリック。
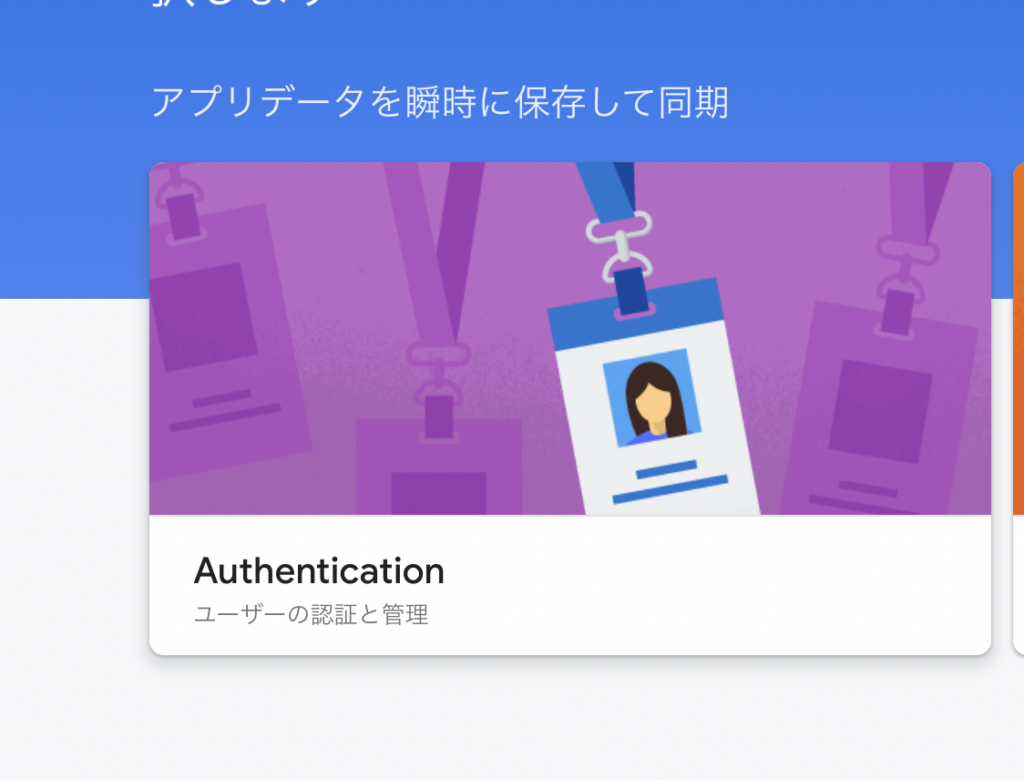
するとこんな感じの画面が出てくる。
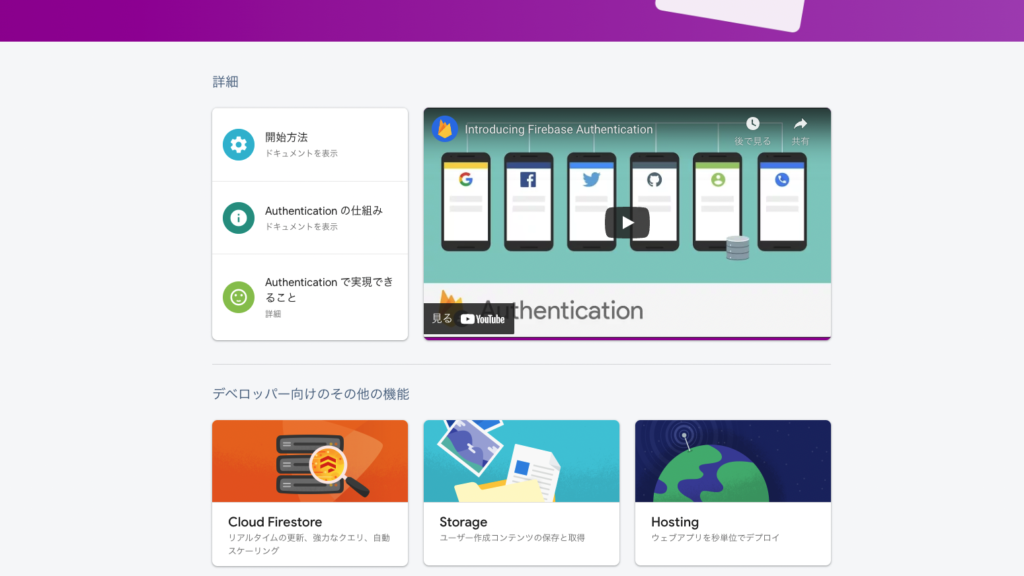
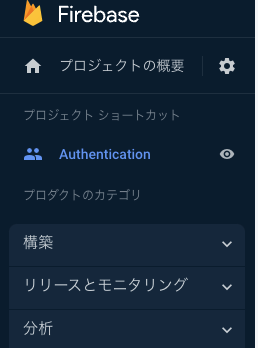
画面左のタブからAuthenticationを選択
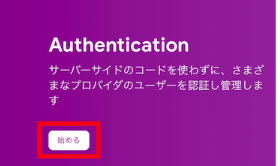
始めるを押下する
するとこんな感じでログイン方法を選択する画面が出てくるのでgoogleを選択(一度やってしまったので、選択済みになっています)
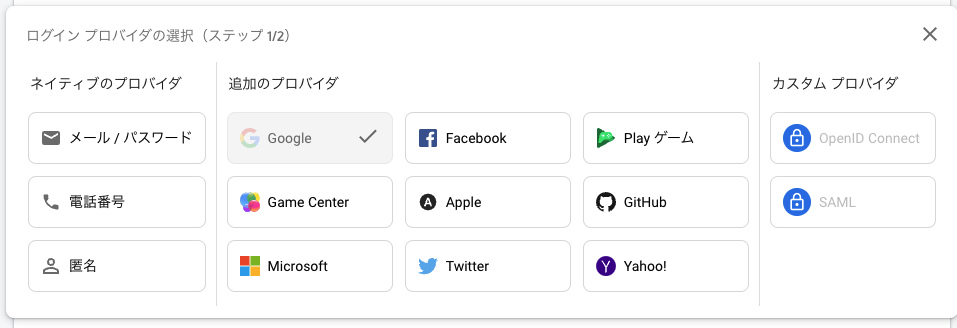
するとメールアドレスを登録する画面が出てくるので、入力する。
設定が終わるとこんな感じになります。

google_sign_inをインストールして、googleサインインを実装していきます。
ターミナルで以下のコマンドを実行。
|
1 |
flutter pub add google_sign_in |
main.dartを以下のコードに書き換える。
|
1 2 3 4 5 6 7 8 9 10 11 12 13 14 15 16 17 18 19 20 21 22 23 24 25 26 27 28 29 30 31 32 33 34 35 36 37 38 39 40 41 42 43 44 45 46 47 48 49 50 51 52 53 54 55 56 57 58 59 60 61 62 63 64 65 66 67 68 69 70 71 72 73 74 75 76 77 78 79 80 81 82 83 84 85 86 87 88 89 90 91 92 93 94 95 96 97 98 99 100 101 102 103 104 105 106 107 108 109 110 111 112 113 114 115 116 117 118 119 120 121 122 123 124 125 126 127 128 129 130 131 132 133 134 135 136 137 138 139 140 141 142 143 144 145 146 147 148 149 150 151 152 153 154 155 156 157 158 159 160 161 162 163 164 |
// Copyright 2013 The Flutter Authors. All rights reserved. // Use of this source code is governed by a BSD-style license that can be // found in the LICENSE file. // ignore_for_file: public_member_api_docs import 'dart:async'; import 'dart:convert' show json; import 'package:flutter/material.dart'; import 'package:google_sign_in/google_sign_in.dart'; import 'package:http/http.dart' as http; GoogleSignIn _googleSignIn = GoogleSignIn( // Optional clientId // clientId: '479882132969-9i9aqik3jfjd7qhci1nqf0bm2g71rm1u.apps.googleusercontent.com', scopes: <String>[ 'email', 'https://www.googleapis.com/auth/contacts.readonly', ], ); void main() { runApp( const MaterialApp( title: 'Google Sign In', home: SignInDemo(), ), ); } class SignInDemo extends StatefulWidget { const SignInDemo({Key? key}) : super(key: key); @override State createState() => SignInDemoState(); } class SignInDemoState extends State<SignInDemo> { GoogleSignInAccount? _currentUser; String _contactText = ''; @override void initState() { super.initState(); _googleSignIn.onCurrentUserChanged.listen((GoogleSignInAccount? account) { setState(() { _currentUser = account; }); if (_currentUser != null) { _handleGetContact(_currentUser!); } }); _googleSignIn.signInSilently(); } Future<void> _handleGetContact(GoogleSignInAccount user) async { setState(() { _contactText = 'Loading contact info...'; }); final http.Response response = await http.get( Uri.parse('https://people.googleapis.com/v1/people/me/connections' '?requestMask.includeField=person.names'), headers: await user.authHeaders, ); if (response.statusCode != 200) { setState(() { _contactText = 'People API gave a ${response.statusCode} ' 'response. Check logs for details.'; }); print('People API ${response.statusCode} response: ${response.body}'); return; } final Map<String, dynamic> data = json.decode(response.body) as Map<String, dynamic>; final String? namedContact = _pickFirstNamedContact(data); setState(() { if (namedContact != null) { _contactText = 'I see you know $namedContact!'; } else { _contactText = 'No contacts to display.'; } }); } String? _pickFirstNamedContact(Map<String, dynamic> data) { final List<dynamic>? connections = data['connections'] as List<dynamic>?; final Map<String, dynamic>? contact = connections?.firstWhere( (dynamic contact) => contact['names'] != null, orElse: () => null, ) as Map<String, dynamic>?; if (contact != null) { final Map<String, dynamic>? name = contact['names'].firstWhere( (dynamic name) => name['displayName'] != null, orElse: () => null, ) as Map<String, dynamic>?; if (name != null) { return name['displayName'] as String?; } } return null; } Future<void> _handleSignIn() async { try { await _googleSignIn.signIn(); } catch (error) { print(error); } } Future<void> _handleSignOut() => _googleSignIn.disconnect(); Widget _buildBody() { final GoogleSignInAccount? user = _currentUser; if (user != null) { return Column( mainAxisAlignment: MainAxisAlignment.spaceAround, children: <Widget>[ ListTile( leading: GoogleUserCircleAvatar( identity: user, ), title: Text(user.displayName ?? ''), subtitle: Text(user.email), ), const Text('Signed in successfully.'), Text(_contactText), ElevatedButton( onPressed: _handleSignOut, child: const Text('SIGN OUT'), ), ElevatedButton( child: const Text('REFRESH'), onPressed: () => _handleGetContact(user), ), ], ); } else { return Column( mainAxisAlignment: MainAxisAlignment.spaceAround, children: <Widget>[ const Text('You are not currently signed in.'), ElevatedButton( onPressed: _handleSignIn, child: const Text('SIGN IN'), ), ], ); } } @override Widget build(BuildContext context) { return Scaffold( appBar: AppBar( title: const Text('Google Sign In'), ), body: ConstrainedBox( constraints: const BoxConstraints.expand(), child: _buildBody(), )); } } |
ここまでやれば仕込みが完了。
この後はOS毎に設定が必要になります。
①finger printの取得
まずはここを参考に、fingerprintを取得します。
ターミナルで以下のコマンドを入力してください。
|
1 |
https://developers.google.com/android/guides/client-auth?authuser=1&hl=ja |
もしパスワードを聞かれたら、androidと打ちましょう。
するとSHA1,SHA256のfingerprint1が出力されるので、SHA1のfingerprintをコピーします。
②fireaseプロジェクトに登録
Firebaseコンソールからandroidアプリをクリックして、歯車マークをクリック。

プロジェクト設定画面が開くので、画面を下の方にスクロールすると、以下の画面が出てくるので、フィンガープリントを追加をクリックします。
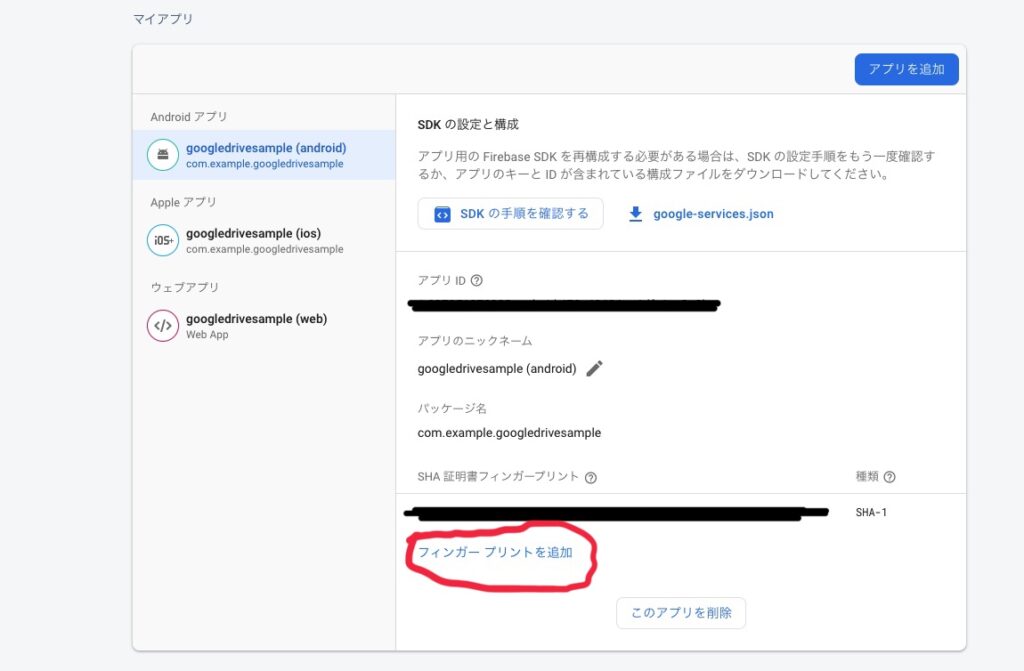
以下の画面が出てくるので、先ほどコピーしたフィンガープリントを入力すればOK

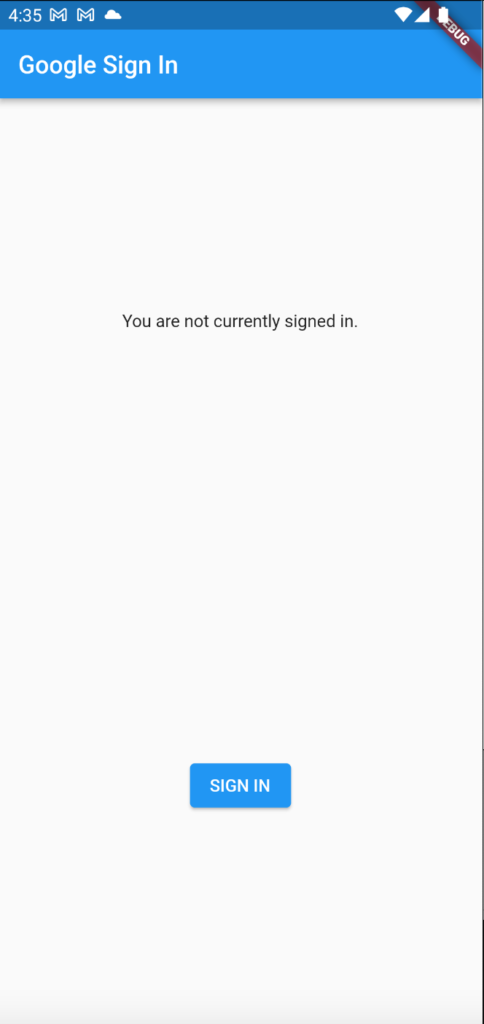
これでandroidの設定はおしまいです。サンプルコードを実行するとアプリが立ち上がります。
個人情報満載なので、詳細はお見せできませんが、サインインができるようになっています。
ドキュメントに従って進めていきます。
- First register your application.
- Make sure the file you download in step 1 is named
GoogleService-Info.plist. - Move or copy
GoogleService-Info.plistinto the[my_project]/ios/Runnerdirectory. - Open Xcode, then right-click on
Runnerdirectory and selectAdd Files to "Runner". - Select
GoogleService-Info.plistfrom the file manager. - A dialog will show up and ask you to select the targets, select the
Runnertarget. - Then add the
CFBundleURLTypesattributes below into the[my_project]/ios/Runner/Info.plistfile.
1.First register your application
これは既にほぼ終わっているので飛ばします。
2.Make sure the file you download in step 1 is named GoogleService-Info.plist.
Firebase 構成ファイルを追加するをやれば完了です。
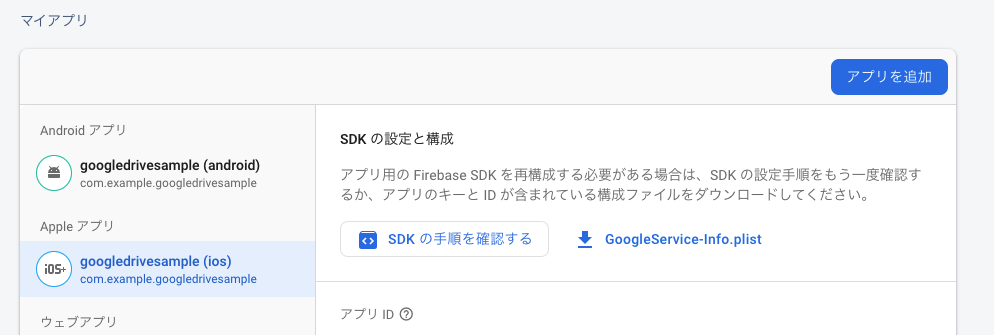
①Firebaseプロジェクトのトップページに戻りiOSアプリの歯車をクリック

②下の方にスクロースするとGoogleService-info.plistをダウンロードするボタンが出てくるのでダウンロードする。
3.Move or copy GoogleService-Info.plist into the [my_project]/ios/Runner directory.
Finderから/iOS/Runner下にコピーすればOKです。
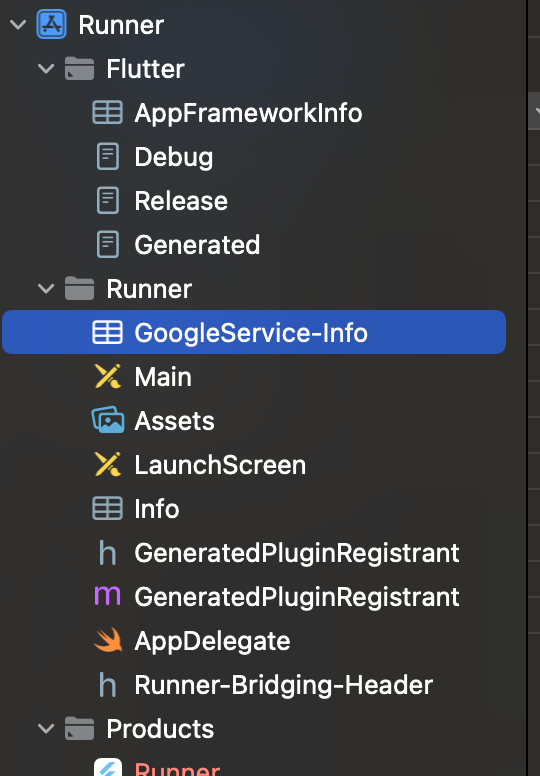
Xcodeで見るとこんな感じ。
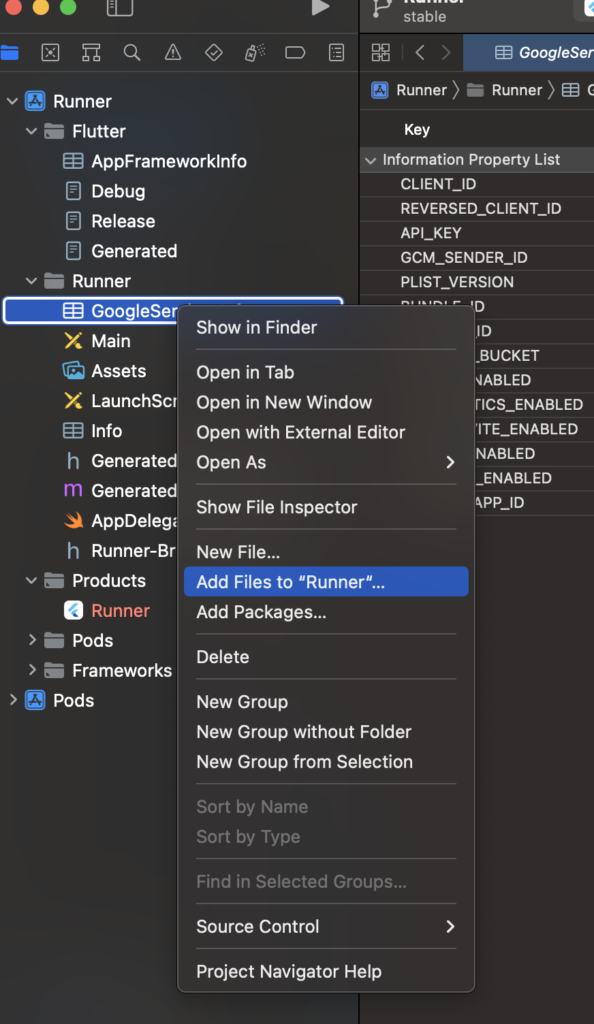
4.Open Xcode, then right-click on Runner directory and select Add Files to "Runner".
右クリックしてAdd Files to "Runnerをクリックすれば良い
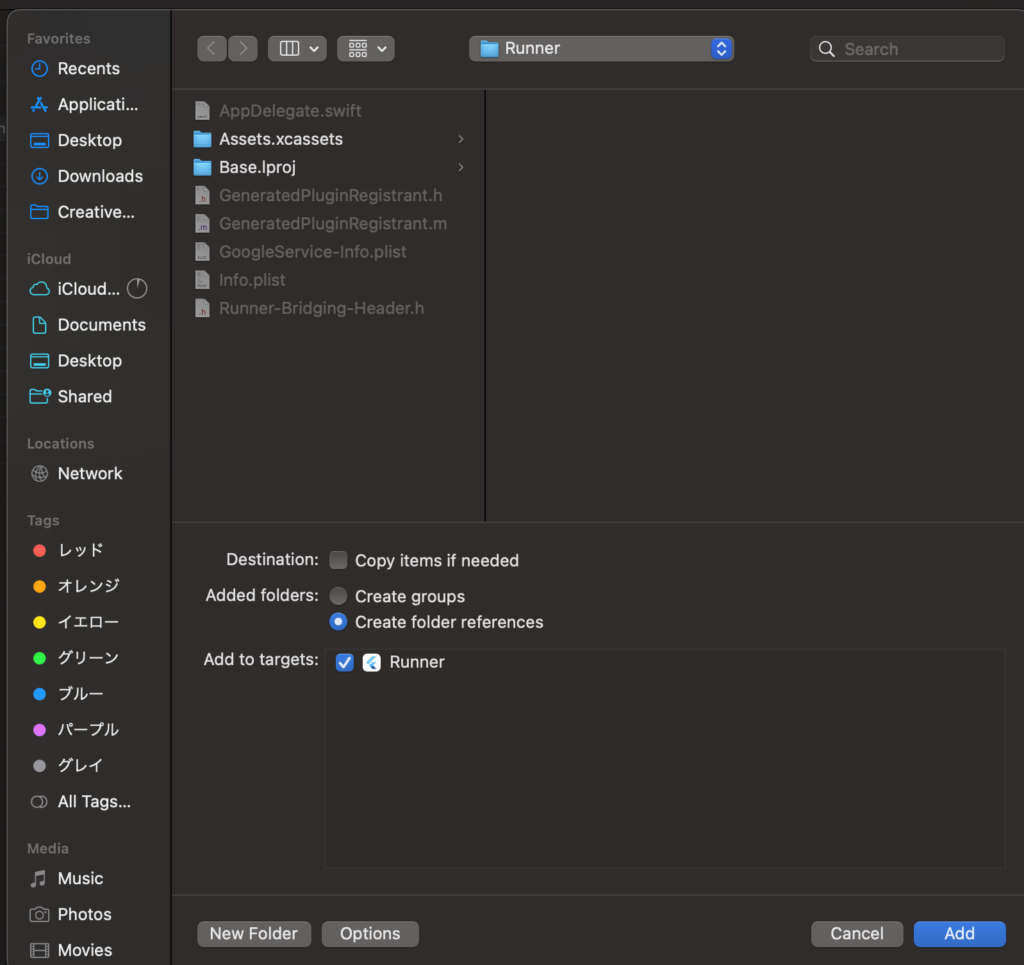
5.Select GoogleService-Info.plist from the file manager.
6.A dialog will show up and ask you to select the targets, select the Runner target.
以下の画面でGoogleService-Info.plistを選択してRunnerにチェックを入れればOKです。(既に選択してしまっているのでグレーアウトしています)
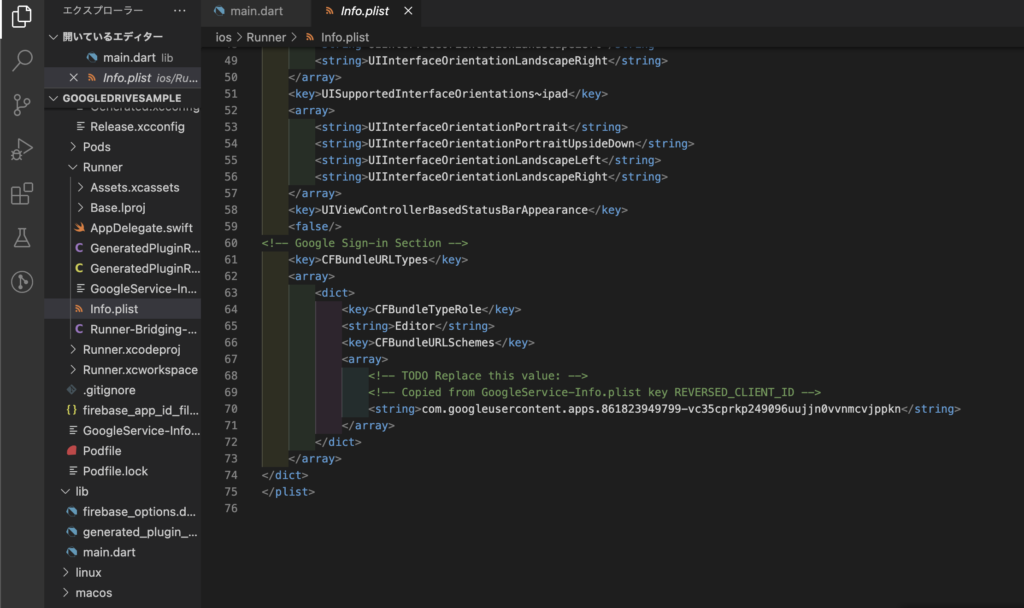
7.Then add the CFBundleURLTypes attributes below into the [my_project]/ios/Runner/Info.plist file.
VScodeでInfo.plistを開き以下のコードを追加します。
この時IDをGoogleService-Info.plistから取得できるREVERSED_CLIENT_IDに書き換えるのを忘れないでください。
REVERSED_CLIENT_IDはGoogleService-Info.plistの8行目に記載されている。com.~~というやつです。
|
1 2 3 4 5 6 7 8 9 10 11 12 13 14 15 16 |
<!-- Put me in the [my_project]/ios/Runner/Info.plist file --> <!-- Google Sign-in Section --> <key>CFBundleURLTypes</key> <array> <dict> <key>CFBundleTypeRole</key> <string>Editor</string> <key>CFBundleURLSchemes</key> <array> <!-- TODO Replace this value: --> <!-- Copied from GoogleService-Info.plist key REVERSED_CLIENT_ID --> <string>com.googleusercontent.apps.861823949799-vc35cprkp249096uujjn0vvnmcvjppkn</string> </array> </dict> </array> <!-- End of the Google Sign-in Section --> |
これで実行するとgoogle Sign in できます!
ドキュメントを見ながら進めていく。
①Google Sign-In OAuth client IDを作成する
ここにアクセスして手順を確認。
すると、ここからクライアントIDを作る必要があることがわかる。
プロジェクト作成ボタンを押下する。

すると以下の画面に遷移するのでプロジェクト名を入力して作成ボタンをクリック
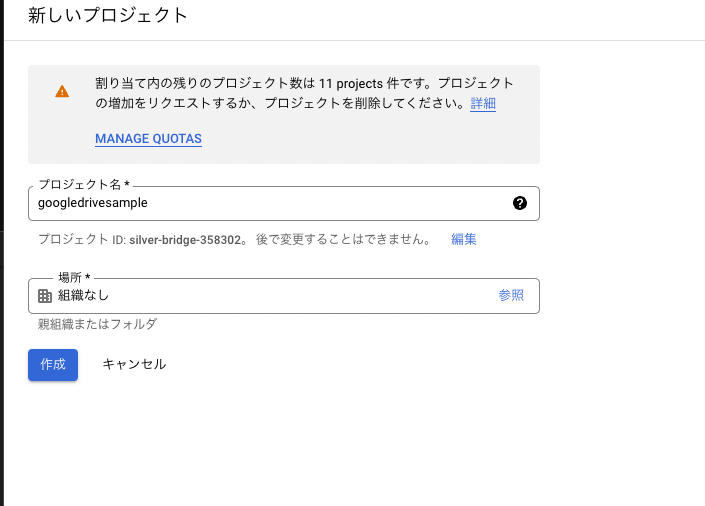
作成が終わると以下の画面になるので、右上にある「同意画面を構成」ボタンをクリックします。

すると以下の画面が立ち上がるので外部を選択して作成ボタンをクリック
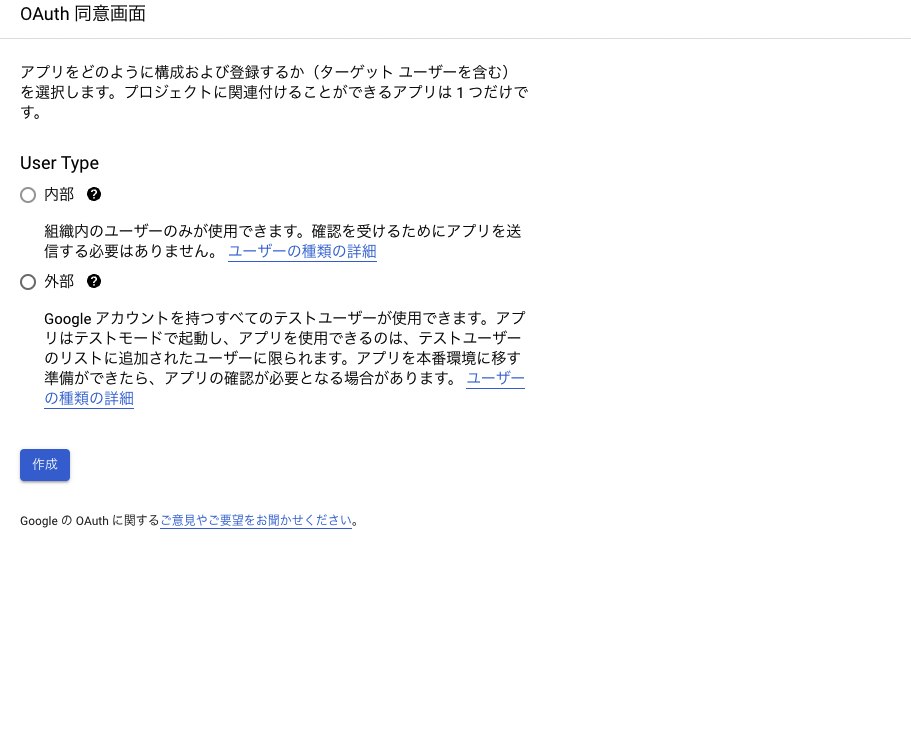
次に出てくる画面で、必要事項を記入して保存をしてください。
するとOAuth同意画面が作成されます。
再び認証情報タブをクリックし、「CREATE CREDENTIALS」ボタンをクリックします。
OAUTHクライアントIDをクリックします。
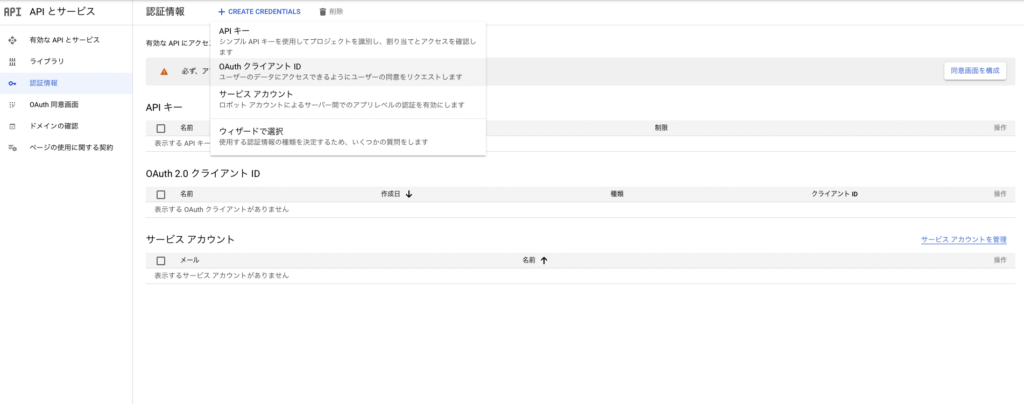
すると以下の画面が出てくるので、
アプリケーションの種類:ウェブアプリケーション
名前:任意
を記入して作成ボタンをクリック
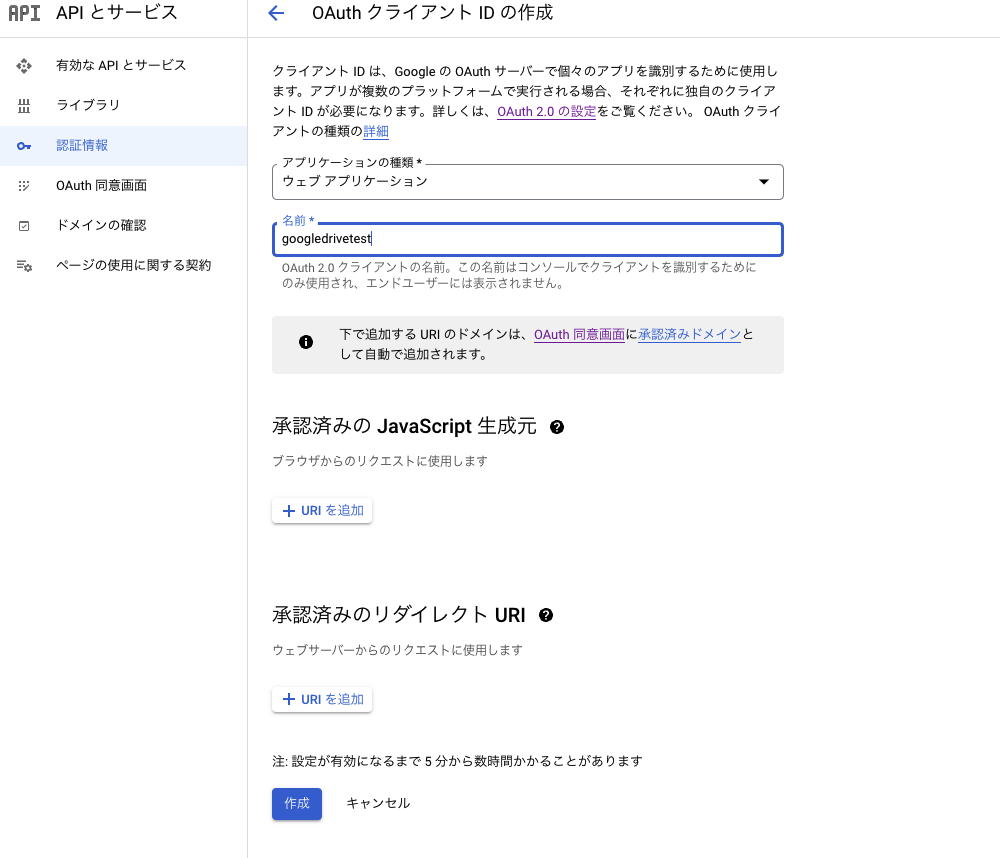
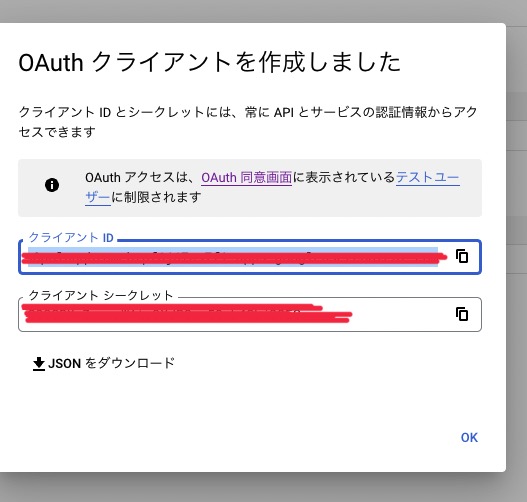
作成が完了すると、クライアントIDが作成されるので、メモしておく。
②web/index.htmlにmetaタグを追加
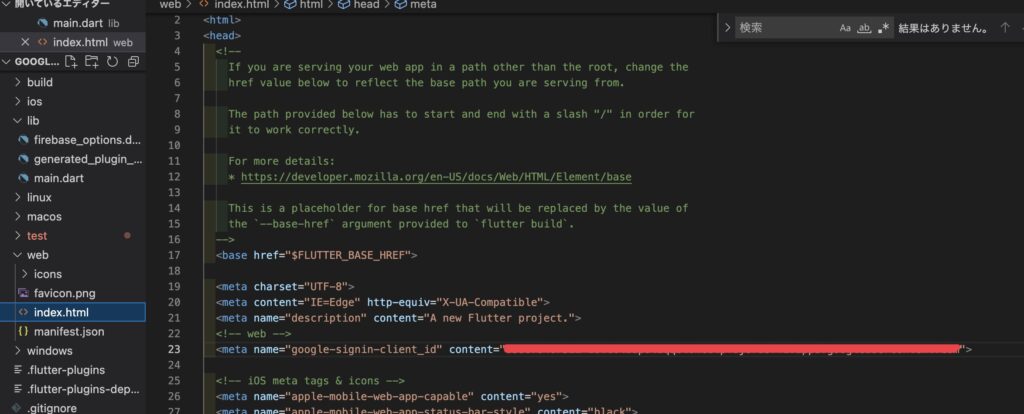
以下のコードのcontent=以下を先ほどメモしてクライアントIDに書き換えたものを、web/index.htmlに追加します。
|
1 |
<meta name="google-signin-client_id" content="YOUR_GOOGLE_SIGN_IN_OAUTH_CLIENT_ID.apps.googleusercontent.com"> |
こんな感じになります。
③ポートを指定する
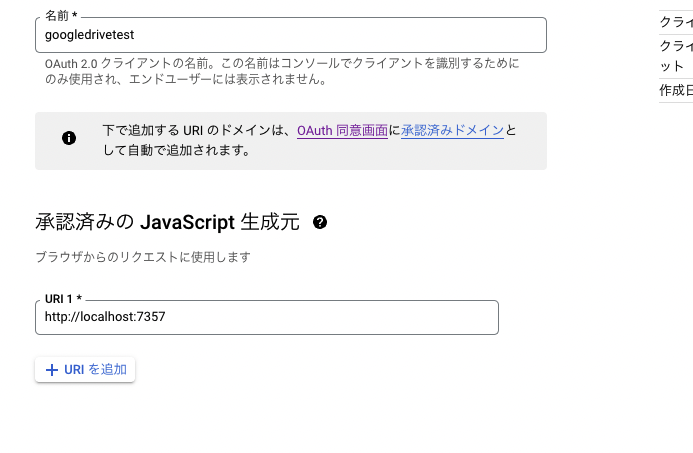
Credentials pageに行き、OAuthのEditボタンをクリックします。

承認済みのJavascript生成元のURI欄を記述して保存ボタンをクリック。
ローカルでデバッグする場合は以下を指定します。
|
1 |
http://localhost:7357 |
これで準備が整いましたので、以下のコマンドでデバッグ実行するとgoogle認証が使えるようになります。(デバッグ実行時はランダムでポートが作成されてしまうので、ここではポートを指定して実行しています。)
|
1 |
flutter run -d chrome --web-hostname localhost --web-port 7357 |


