Index
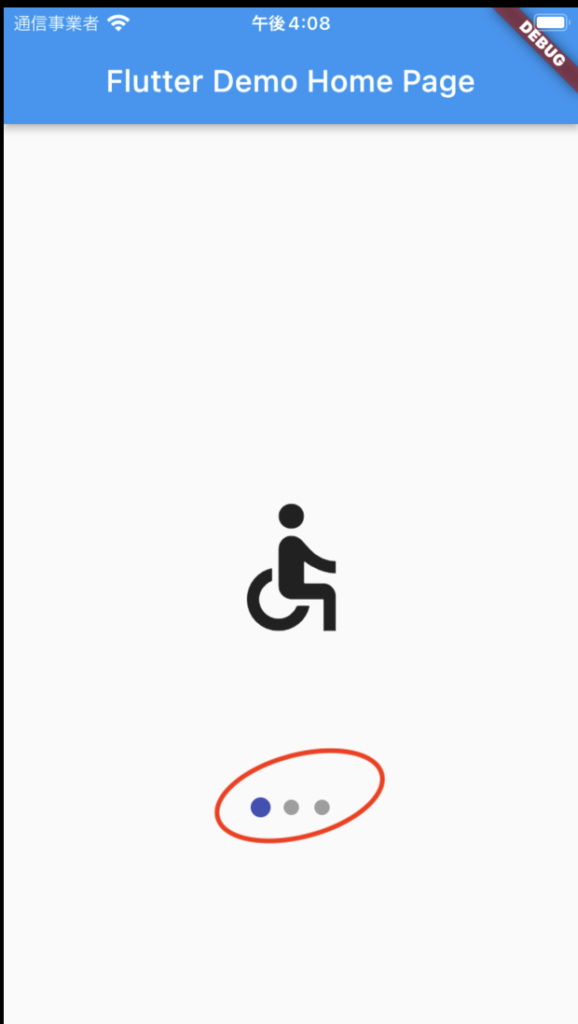
以下の画像で赤丸で囲まれている部分のことです。

後述するサンプルコードの実行結果は以下の通りです。
|
1 2 3 4 5 6 7 8 9 10 11 12 13 14 15 16 17 18 19 20 21 22 23 24 25 26 27 28 29 30 31 32 33 34 35 36 37 38 39 40 41 42 43 44 45 46 47 48 49 50 51 52 53 54 55 56 57 58 59 60 61 62 63 64 65 66 67 68 69 70 71 72 73 74 75 76 77 78 79 80 81 82 83 84 |
import 'package:flutter/material.dart'; import 'package:smooth_page_indicator/smooth_page_indicator.dart'; void main() { runApp(const MyApp()); } class MyApp extends StatelessWidget { const MyApp({Key? key}) : super(key: key); // This widget is the root of your application. @override Widget build(BuildContext context) { return MaterialApp( title: 'Flutter Demo', theme: ThemeData( primarySwatch: Colors.blue, ), home: const MyHomePage(title: 'Flutter Demo Home Page'), ); } } class MyHomePage extends StatefulWidget { const MyHomePage({Key? key, required this.title}) : super(key: key); @override State<MyHomePage> createState() => _MyHomePageState(); } class _MyHomePageState extends State<MyHomePage> { @override Widget build(BuildContext context) { return Scaffold( appBar: AppBar( title: Text(widget.title), ), body: Center( child: Column( children: <Widget>[ SizedBox( height: 300, child: PageView( controller: controller, children: const [ Center( child: Icon( Icons.accessible, size: 100, ), ), Center( child: Icon( Icons.abc, size: 100, ), ), Center( child: Icon( Icons.star, size: 100, ), ), ], ), ), SmoothPageIndicator( controller: controller, count: 3, effect: const ScrollingDotsEffect( activeStrokeWidth: 2.6, activeDotScale: 1.3, maxVisibleDots: 5, radius: 8, spacing: 10, dotHeight: 10, dotWidth: 10, ), ), ], ), ), ); } } |
ターミナルで以下のコードを実行してください。
HTML
|
1 |
flutter pub add smooth_page_indicator |
すると以下のコードがpubspec.yamlファイルに追加されているはずです。(バージョンは異なる場合がございます)
|
1 2 |
dependencies: smooth_page_indicator: ^1.0.0+2 |
サンプルコードでは以下のコードが該当します。
|
1 |
final controller = PageController(viewportFraction: 0.8); |
controllerはpagevViewを操作するために必要になります。
色々な設定をできますが、隣同士の画像の端をどれくらい画面に表示するか?のみを設定しています。(サンプルコードではアイコン自体が小さいので何も見えませんが…)
controllerの詳細は公式リファレンスを参照ください。
スライドさせたいコンテンツを作成していきます。サンプルコードでは以下のコード(三つのアイコン)が該当します。
|
1 2 3 4 5 6 7 8 9 10 11 12 13 14 15 16 17 18 19 20 21 22 23 |
PageView( controller: controller, children: const [ Center( child: Icon( Icons.accessible, size: 100, ), ), Center( child: Icon( Icons.abc, size: 100, ), ), Center( child: Icon( Icons.star, size: 100, ), ), ], ), |
pageviewの詳細は公式リファレンスを参照してください。
いよいよ本題に入っていきます。
設定の詳細はコメントで記載しておいたので、ご確認ください
|
1 2 3 4 5 6 7 8 9 10 11 12 13 |
SmoothPageIndicator( controller: controller,//忘れないように count: 3,//コンテンツの数を指定 effect: const ScrollingDotsEffect(// ドットの設定をする activeStrokeWidth: 2.6,//スクロールの幅 activeDotScale: 1.3, maxVisibleDots: 5,//最大で見えるdotの数(5未満にはできない) radius: 8,//丸さ spacing: 10,//ドットの間隔 dotHeight: 10,//ドットの高さ dotWidth: 10,//ドットの幅 ), ), |
ここまで実装すれば、使えるようになっているはずです。


